

Do you still remember this post? Yeah! Triet Nguyen was one of our "Visualizer on the Spot". If you have a Facebook account, you can view his work HERE.
 I asked him about his technique via his Facebook page, then realizing he is creating a tutorial on his technique. Here is Triet Nguyen's Cool Effects technique using SketchUp and Photoshop. Alternatively you can also view this at www.sketchucation.com
Here is Triet Nguyen's Tutorial
In this exercise, we will light up an image in Photoshop by painting and using layer blending modes.
Step 1
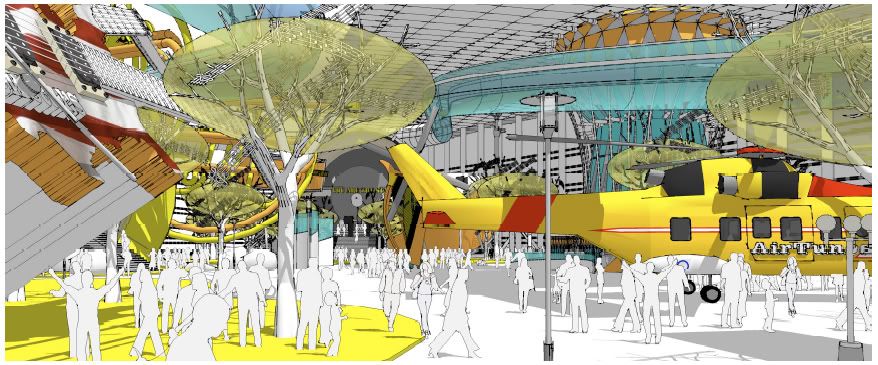
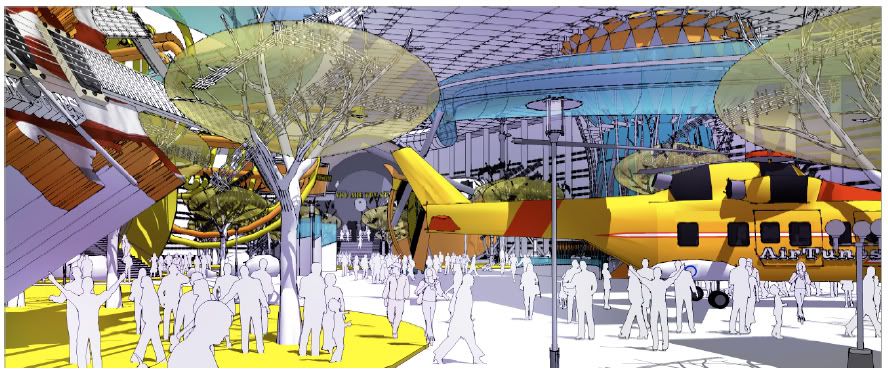
Export 2D colored image from Sketchup with full color, shadows and textures.
Step 2
Step 3
 Step 5
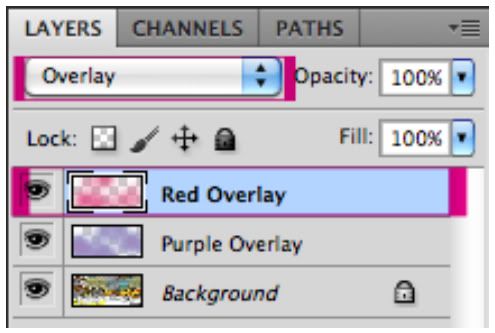
Repeating step 2, this time we will name the new layer Red Overlay (see image below).
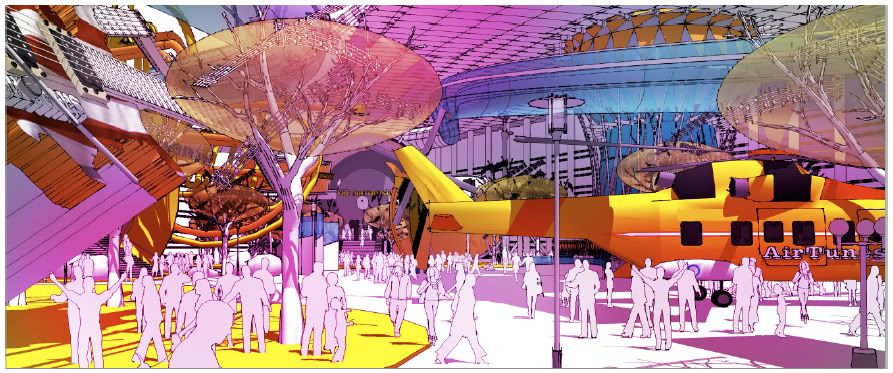

Final Image


Here is Triet Nguyen's Tutorial
In this exercise, we will light up an image in Photoshop by painting and using layer blending modes.
Step 1
Export 2D colored image from Sketchup with full color, shadows and textures.
Step 2
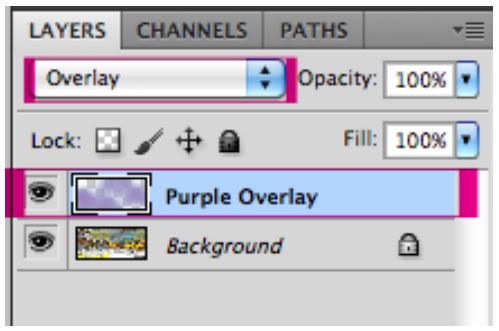
Launch Photoshop and open the image. I cropped the example to 2669 x 1098 pixels. Create a layer and call it Purple Overlay; and set layer blending mode to Overlay.
Step 3
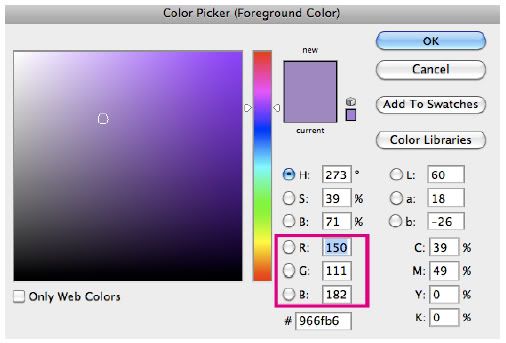
Select the Airbrush Soft Round with Opacity 35. Choosing the size of the brush depends on the size of the image. Ideally, we want this effect resembling purple neon light to blend with the other colors. In this case, I set the radius of the brush to 500 pixels. Open Color Picker by clicking on the Foreground Color from the tool set and choose purple color with the settings: R: 150, G: 111 and B: 182. (see image below)
Step 4
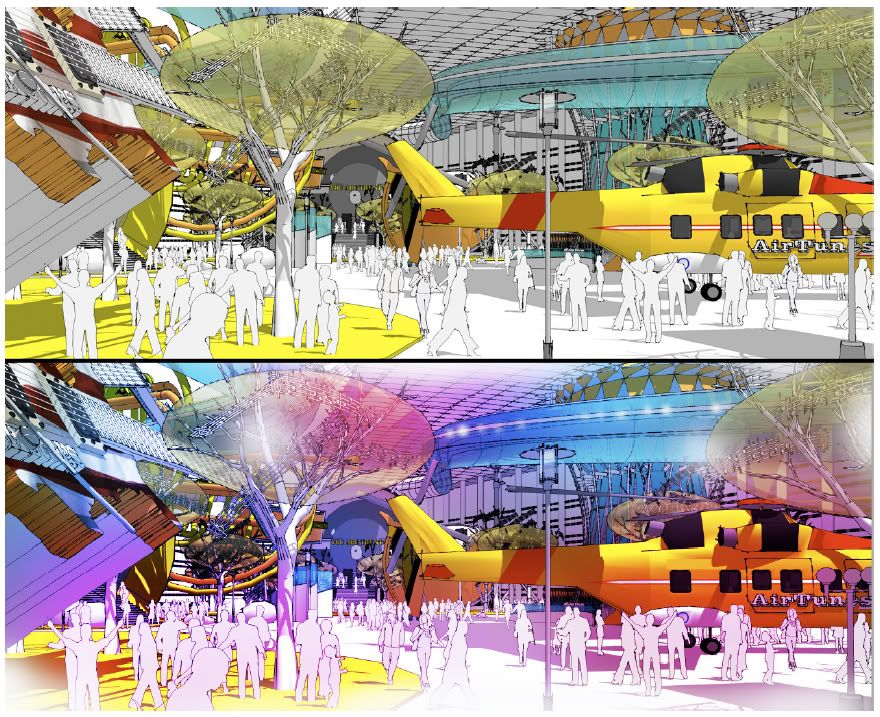
Make sure the Purple Overlay layer is highlighted. Now we are ready to light up the image by starting to paint areas as desired. We will see the image begin to brighten up with a hint of the purple neon light effect.
Repeating step 2, this time we will name the new layer Red Overlay (see image below).
Again select the Airbrush Soft Round with Opacity 35 and radius 500 pixels, choosing red color with the settings: R:248, G: 27 and B: 136. Select the Red Overlay layer and start painting on the areas we want to light up. The image start to look more interesting now, but we need some blue neon lights.
Step 6
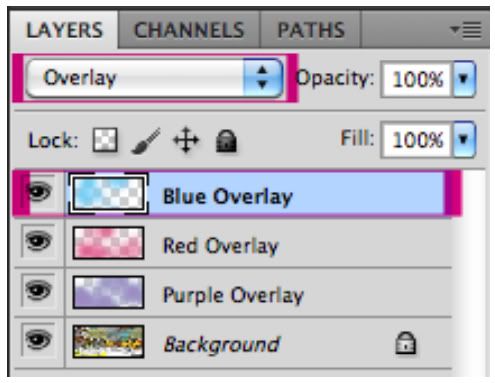
As with step 2 and 5, we will create a layer called Blue Overlay and set the layer mode to overlay.
Again, select the Airbrush Soft Round with Opacity 35 and radius 500 pixels. Choose purple color with the settings: R:19, G: 200 and B: 247. Select the Blue Overlay layer and start painting on the glass tube, ceiling, guitar set and parts of the floor. The picture is glowing,
however it needs touching up here and there. In this particular case, I create some spotlights.
however it needs touching up here and there. In this particular case, I create some spotlights.
Step 7
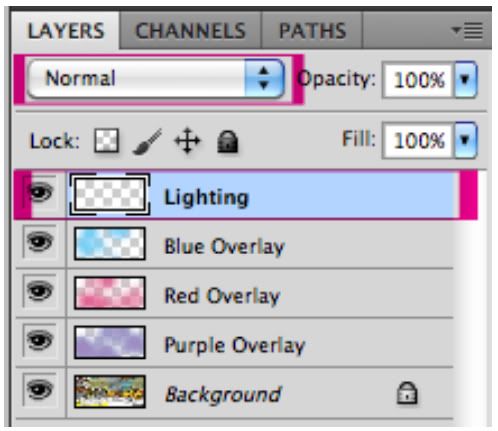
We create a layer called Lighting with the layer mode as Normal by default.
Choose the Airbrush Soft Round with Opacity 50 and set radius to 30 pixels. Pick the white color from the Color Picker or press key D to bring black and white color for the background and foreground. (Press key X to switch background and foreground). Start creating some lights on the glass tube, “music trees” and drum set. Boom... Itʼs done.
Final Image
No comments:
Post a Comment